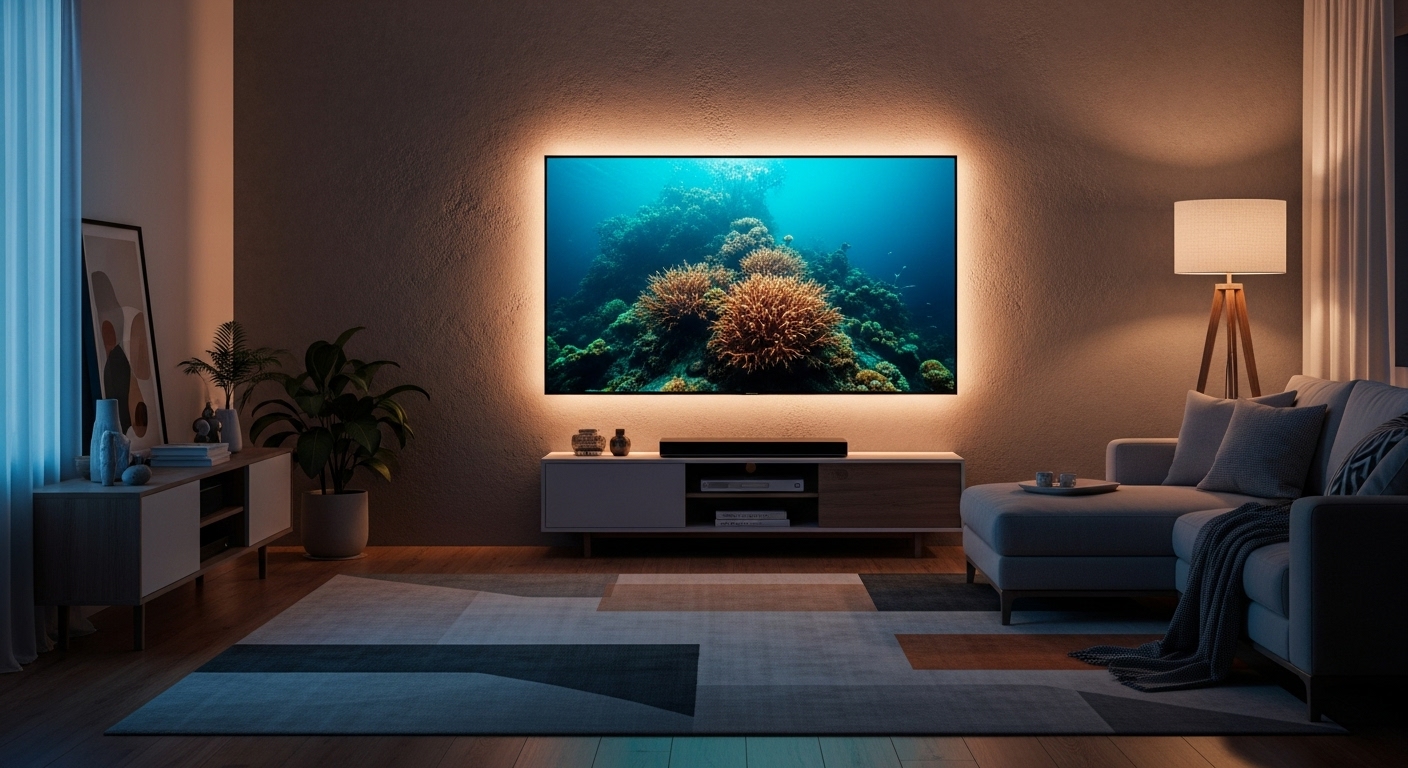
A well-mounted TV looks clean, feels comfortable to watch, and doesn’t turn into a neck-craning regret. The “right way” isn’t just drilling into the wall—it’s planning height, viewing angle, stud placement, and cable management so everything stays safe and looks intentional.
Below is a practical, experience-based guide you can follow even if you’re not a DIY pro.
Before you start: what you need (simple checklist)
- Stud finder (with deep-scan if possible)
- Level (a long one helps)
- Tape measure + painter’s tape
- Drill + correct drill bits
- Socket wrench / driver for lag bolts
- TV mount rated for your TV’s size/weight
- Helper (mounting solo is possible, but not fun)
Safety note: If you’re unsure about wall type (plaster, brick, metal studs, or older drywall), slow down and confirm what you’re drilling into. This is where most mounting disasters happen.
Step 1: Choose the right mount type
Fixed mount
- Best for: clean look, simplest install
- Downsides: no tilt; glare and high placement can be uncomfortable
Tilting mount
- Best for: TVs mounted slightly high, reducing glare
- Downsides: doesn’t swivel toward side seating
Full-motion (articulating) mount
- Best for: corner setups, wide seating areas, or frequent angle changes
- Downsides: heavier, more complex install, needs solid studs
Rule of thumb: If you’re mounting at a normal height straight ahead, a tilt mount is the most forgiving.
Step 2: TV height guide (the part people get wrong)
The comfort standard
For living room viewing, a good target is:
Your eyes should land around the center of the screen when seated.
That’s the simplest guideline that works for most homes.
Easy method (no math)
- Sit on your couch in your usual spot.
- Look straight ahead (don’t tilt your head).
- Mark that point on the wall with painter’s tape—this is your eye level.
- Aim to place the center of the TV roughly at that height.
If you want a more practical “real home” adjustment
Most people mount TVs a little higher than perfect eye-level because of consoles, soundbars, kids, or decor. That’s fine—just don’t go too high.
A common comfortable range:
- TV center sits a few inches above eye level
- If the TV must be higher, use a tilting mount to angle it downward
Quick “too high” test
If you have to tilt your chin up to watch, it’s too high.
If your neck feels stiff after a movie, it’s too high.
Step 3: Plan your wall layout (console, soundbar, outlets)
Leave breathing room above the console
You want space so the TV doesn’t feel like it’s sitting on the furniture.
A clean look usually means:
- enough gap for a soundbar (if you use one)
- enough clearance to clean and access devices
Soundbar placement matters
If the soundbar will sit on the console:
- Make sure it won’t block the screen bottom edge
If it will be wall-mounted: - plan its mounting height first so it lines up neatly
Step 4: Find studs and mark the bracket holes
Studs are non-negotiable (for most mounts)
- Use a stud finder to locate studs.
- Mark stud centers with painter’s tape.
- Confirm by finding the stud edges on both sides, then mark the middle.
Do not rely on drywall anchors for a heavy TV unless your mount and wall type specifically support it and you’re confident in the rating.
Keep it centered visually
Stud placement doesn’t always line up with the “center of the wall.”
If your studs aren’t centered where you want the TV, you have options:
- Choose a mount with a wide wall plate that spans multiple studs
- Use a mount that allows left/right shift on the bracket
- Consider a full-motion mount (often gives more positioning flexibility)
Step 5: Install the wall plate (level is everything)
- Hold the wall plate up where you planned the height
- Use a level and mark the holes
- Pre-drill pilot holes
- Install lag bolts tightly into the studs
Pro tip: Step back and check the height with painter’s tape outlining the TV shape before drilling.
Step 6: Attach the TV brackets and hang the TV
- Attach brackets to the TV using the correct screws (often provided with the mount)
- Don’t overtighten into the TV—snug is enough
- Lift and hook the TV onto the wall plate (use a helper)
- Lock it in place per the mount instructions
Cable management tips (clean look, no headaches)
Option A: Fastest clean look (raceway/cable cover)
This is the easiest:
- Stick-on or screw-on raceway down to the console
- Paintable to match the wall
- No cutting drywall
Best for: renters or anyone who wants a clean result quickly.
Option B: In-wall cable kit (cleanest look)
If you want the “floating TV” look:
- Use an in-wall rated power + cable kit (made for this)
- Keep low-voltage cables separate as recommended
Important: Don’t run a regular power cord inside the wall unless the kit is designed and rated for in-wall use.
Option C: Hide everything behind the console
If your TV is only slightly above the console:
- Use Velcro ties, a cable box, and short cables
- Route cables along the back edges
Cable organization that actually stays tidy
- Use Velcro ties (easier than zip ties when you change devices)
- Label ends (HDMI 1, HDMI 2) with small tags
- Use shorter cables where possible to reduce spaghetti
- Keep power cables and signal cables grouped neatly
Common mistakes (and how to avoid them)
1) Mounting too high
Most common regret. Fix: aim for center at seated eye level or slightly above, and tilt if needed.
2) Not planning for glare
If there’s a window opposite the TV, a fixed mount can be annoying. Fix: tilt mount or reposition.
3) Drilling without confirming studs
Fix: mark stud edges and center, then pre-drill.
4) No plan for cables
Fix: decide your cable strategy before mounting so you’re not staring at dangling cords later.
5) Not accounting for future devices
Fix: leave slack, use a raceway that can open, and avoid overly tight ties.
Quick height cheat sheet (simple guidance)
- Best comfort: TV center near seated eye level
- If mounting higher: use a tilting mount and keep it modest
- If you watch from bed: slightly higher can be fine, but tilt down
Final takeaway
The “right” TV mount is:
- centered for your seating
- mounted at a comfortable height
- secured into studs properly
- finished with cable management you won’t hate